.webp)

Want your logo to look sharp everywhere? High-resolution logos are essential for a professional brand image. AI-powered upscaling tools like Logo Diffusion make it easy to enhance your logo's clarity and resolution. Here's a quick overview of what you'll learn in this guide:
Quick Tip: Start with vector files (like SVG) for the best results, and always maintain a resolution of at least 300 DPI for print materials.
This guide will walk you through the entire process, from preparing your files to exporting them in the right format, ensuring your logo looks flawless everywhere.
Getting your files ready is a key step before using AI-powered upscaling tools. The quality of your results depends heavily on how well your input files are prepared. Here’s how to set up your files for the best possible outcome.
Vector files are the gold standard for upscaling. Formats like SVG (Scalable Vector Graphics) are particularly effective because they maintain sharp edges and clarity, no matter how much you scale them. As Bianca Palmer explains:
"Understanding the strengths of each logo file format ensures your logo always looks professional, no matter where it's displayed."
For raster logos, different formats serve specific purposes:
Starting with a high enough resolution is critical for effective upscaling. Logo Diffusion's AI models work best when images meet certain baseline standards. Here are the recommended minimum dimensions:
For print projects, ensure your source file is at least 300 DPI. Higher resolutions improve results for both print and digital use.
Logo Diffusion includes an automatic pre-processing step to prepare logos for upscaling. This process removes backgrounds, isolates key elements, and ensures clean, sharp edges - especially helpful for logos with intricate designs or transparency needs.
Before uploading your logo to Logo Diffusion, double-check these requirements:
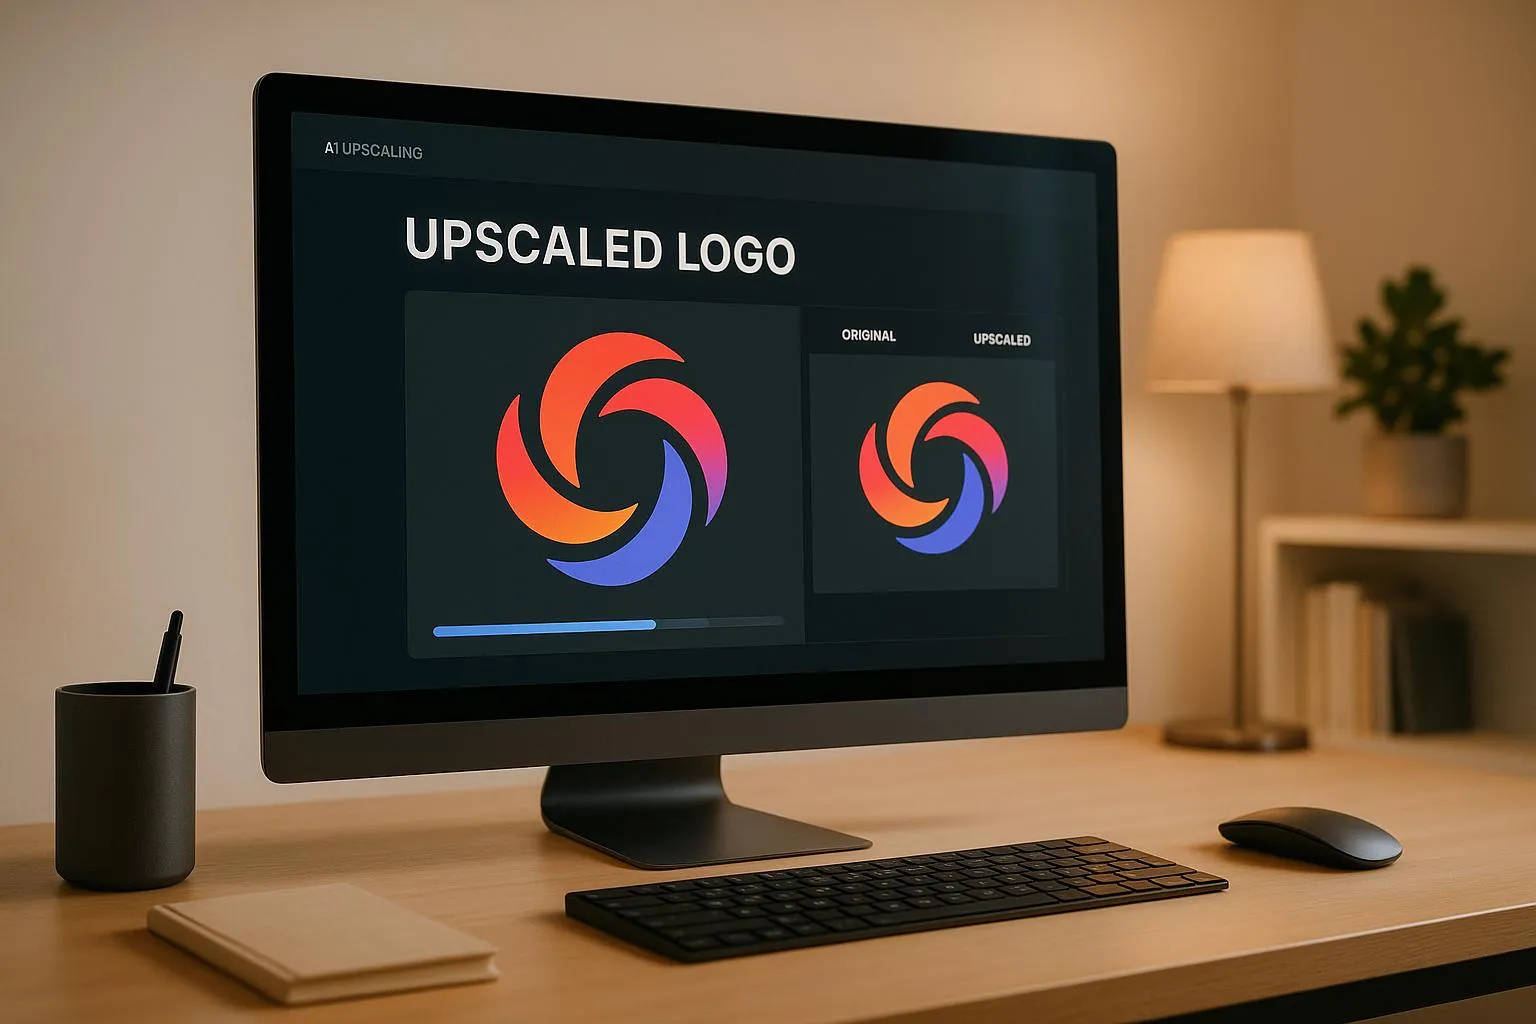
Logo Diffusion's AI models are designed to turn logos into sharp, high-resolution assets that stand out.
Logo Diffusion V.5 introduces a dual-model system, tailored to handle different logo styles and needs:
Both models pair seamlessly with the Creative Upscaler, which enhances details and fixes artifacts for a polished final result.
Logo Diffusion offers flexible upscaling options, which depend on your subscription plan:
To avoid distortion, stick to the original aspect ratio. While the platform suggests the best settings automatically, you can tweak them to fit your specific needs.
"The Creative Upscaler enhances details while upscaling images up to 4x, ensuring high-resolution downloads with beautiful details", says Ali Rahmoun, founder of Logo Diffusion.
Streamline your workflow with batch processing. Logo Diffusion supports processing multiple logo versions at once, with the number of simultaneous jobs depending on your plan:
Consistency is key - apply the same settings across batches to maintain uniform quality. The platform’s queue system ensures every file is processed without compromising quality.
For projects requiring various logo sizes and formats, use the vector export feature. This ensures scalability for all processed versions, making it an essential tool for creating cohesive brand packages.
After upscaling, it's essential to review the results to ensure they meet professional standards.
When inspecting upscaled logos, keep an eye out for these common problems and their fixes:
Always view the logos at both 100% and 300% zoom levels. For example, in Adobe Acrobat, a print-ready logo should maintain sharp, clean edges without any visible degradation, even at 300% magnification.
Once adjustments are made, confirm that the results align with your brand's visual standards.
To ensure the logo meets brand requirements, follow a systematic verification process:
By following these steps, you can ensure that the logo retains its professional appearance across all formats.
Perform a side-by-side comparison of the original and the upscaled versions to confirm that the quality has improved and meets your brand criteria:
"Color consistency reinforces trust. Inconsistency with colors associated with a brand subconsciously diminishes it, and erodes brand loyalty." – Idealliance
Export test versions in both RGB (for web) and CMYK (for print) color spaces. Evaluate these exports under controlled lighting to ensure they appear consistent and meet expectations across all intended applications.
Once you've upscaled your logo, exporting it correctly is key to ensuring it looks great in every context. Logo Diffusion's export tools are designed to help you maintain quality and consistency, whether you're working with digital platforms or print materials. By selecting the right export settings, you can ensure your logo stays sharp and clear no matter where it's used.
Choosing the right file format is essential for different mediums. For web use, PNG and SVG are your go-to options. PNG files with transparent backgrounds deliver clean visuals at 72 DPI, perfect for websites and social media. For print, aim for a resolution of 300 DPI to achieve high-quality results.
When exporting vector files through Logo Diffusion, pay attention to the details to simplify future edits. Make sure vector paths are closed and simplified, convert any text to outlines, and organize layers neatly. This ensures your files are ready for any adjustments down the line.
Managing color profiles properly is essential for keeping your brand's look consistent across different platforms. Logo Diffusion supports both RGB and CMYK color spaces, ensuring accurate color reproduction for web and print.
Here’s how to handle color profiles effectively:
To keep your files organized, adopt a clear naming system that includes the color space and intended use. For example, name files like CompanyName_Logo_RGB_Web.svg or CompanyName_Logo_CMYK_Print.pdf to avoid confusion and streamline your workflow.
Logo Diffusion's Creative Upscaler simplifies the process of improving logo quality, delivering sharp, high-resolution results in just minutes. By combining features like detail enhancement and vector conversion, it drastically reduces the time needed for refinement - from hours to mere minutes.
Here’s how the upscaling options break down for different needs:
These options make it easy to choose the right tool for any application.
"Consistency ties separate pieces of design work together, meaning an audience can immediately understand that these pieces of work are connected and are usually working together to communicate with an audience." – Emily Melling
Research backs this up: businesses with consistent, high-quality branding see up to 20% more overall growth and 33% higher revenue than those with inconsistent branding. By using Logo Diffusion's AI tools, you can achieve consistent branding while saving time on production.
Ethan Brookes is a product-focused content writer covering AI tools, branding, and SaaS workflows. He writes practical guides on using AI for real-world design and product use, with a focus on brand-ready outputs and scalability.


.webp)
.webp)
.webp)